SVG에서 getBBox 활용하기
SVG DOM 객체에 포함된 getBBox 메소드에 대해 알아봅시다!
getBBox란?
SVG 1.1 스펙에서 getBBox에 대한 설명을 보면 아래와 같다.
Returns the tight bounding box in current user space (i.e., after application of the ‘transform’ attribute, if any) on the geometry of all contained graphics elements, exclusive of stroking, clipping, masking and filter effects). Note that getBBox must return the actual bounding box at the time the method was called, even in case the element has not yet been rendered.
www.w3.org
대략 해석해보면 getBBox 함수가 호출되는 순간의 해당 엘리멘트가 차지하는 bounding box의 정보를 리턴한다는 얘기다.
getBBox를 호출하면 SVGRect객체를 리턴하는데 SVGRect는 위치정보와 너비, 높이 정보를 담고 있다. 이를 타입스크립트의 interface로 표현하자면 다음과 같다
interface SVGRect {
    x: number;
    y: number;
    width: number;
    height: number;
}
호출 된 순간의 해당 객체의 위치와 크기 정보를 알려준다는 점에서 jQuery의 offset, width, height 메소드를 합친 것이라고도 볼 수 있을 것 같다.
getBBox 활용하기
텍스트를 포함하는 요소나 하위요소를 포함하는 요소의 경우, 브라우저가 렌더링하기 전까지는 정확한 크기와 위치 등을 알아내기가 쉽지 않다. 이때, getBBox를 이용한다면 이를 쉽게 알 수 있다.
SVG 평면 위에 텍스트와 이를 rect로 감싸는 노드 몇개를 그려보는 예제를 이용해 getBBox를 활용해보자
먼저 SVG에 그려질 노드 정보를 담는 data를 정의한다. 총 3개의 노드를 그릴 것이고, 보다시피 name에 이름, x, y 에 각각 x, y좌표 정보를 담고 있다.
// Data
var data = [{
    name: 'NODE1',
    x: 200,
    y: 100
}, {
    name: 'NODE2',
    x: 200,
    y: 300
}, {
    name: 'NODE3',
    x: 400,
    y: 200
}];
HTML 파일에 노드들이 그려질 svg 평면과 이를 위한 스타일을 정의해준다.
<style>
    #svg {
        width: 100%;
        height: 100%;
    }

    .node rect {
        stroke: skyblue;
        stroke-width: 2px;
        fill: #fff;
    }
    .node text {
        color: #333;
    }
</style>
<svg id="svg" xmlns="http://www.w3.org/2000/svg" version="1.1"></svg>
각각의 노드 데이터를 이용해 svg평면에 노드를 그려준다.
var svg = document.querySelector('#svg');

data.forEach(function (d) {
  // node group (g는 group의 약자로 하위 요소들을 묶는 용도로 쓰임)
  // namespace를 이용하여 생성하여야 svg오브젝트를 얻을 수있음!
  var node = document.createElementNS('http://www.w3.org/2000/svg', 'g');
  node.className.baseVal = 'node';
  // node 그룹의 기준 좌표 설정
  node.setAttribute('transform', 'translate(' + [d.x, d.y] + ')');

  svg.appendChild(node);

  // node label
  var text = document.createElementNS('http://www.w3.org/2000/svg', 'text');
  text.textContent = d.name;

  node.appendChild(text);

  // node rect
  var rect = document.createElementNS('http://www.w3.org/2000/svg', 'rect');
  rect.setAttribute('rx', 5);
  rect.setAttribute('ry', 5);
  node.insertBefore(rect, text);
});
이 코드를 추가해주고 실행시켜주면 아래와 같이 나온다.
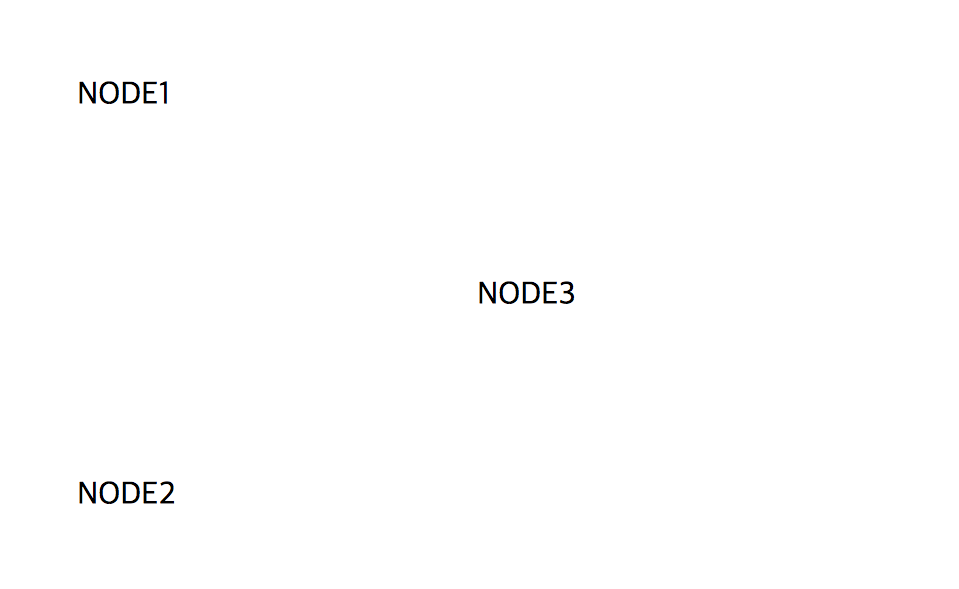
요소검사를 해보면 rect가 코드상으로는 존재하지만 rect가 가져야 할 하늘색 외곽선이 보이지 않는다. rect의 너비와 높이가 지정되지 않아 기본값인 0으로 지정되어있기 때문이다. 이를 지정해주는 코드를 추가해주면 되는데 형제 요소가 text인게 문제다.
폰트에 따라, 글자 수에 따라 text요소의 길이는 천차만별이기 때문이다. 이때 getBBox를 이용해보자
  // node label
  var text = document.createElementNS('http://www.w3.org/2000/svg', 'text');
  text.textContent = d.name;

  // 여기서 getBBox를 호출할 경우, text.getBBox() => { x:0, y:0, width:0, height:0 }

  node.appendChild(text); // 여기서 렌더링이 이뤄지므로 렌더링 한 이후에 getBBox를 호출해야함!

  var bbox = text.getBBox();

  // node rect
  var rect = document.createElementNS('http://www.w3.org/2000/svg', 'rect');
  rect.setAttribute('rx', 5);
  rect.setAttribute('ry', 5);
  node.insertBefore(rect, text);

  // rect의 크기 설정
  rect.setAttribute('width', bbox.width + textMargin * 2);
  rect.setAttribute('height', bbox.height + textMargin * 2);
이렇게 getBBox호출 코드와 이를 이용해 rect의 크기를 설정해주는 코드를 추가해주면,
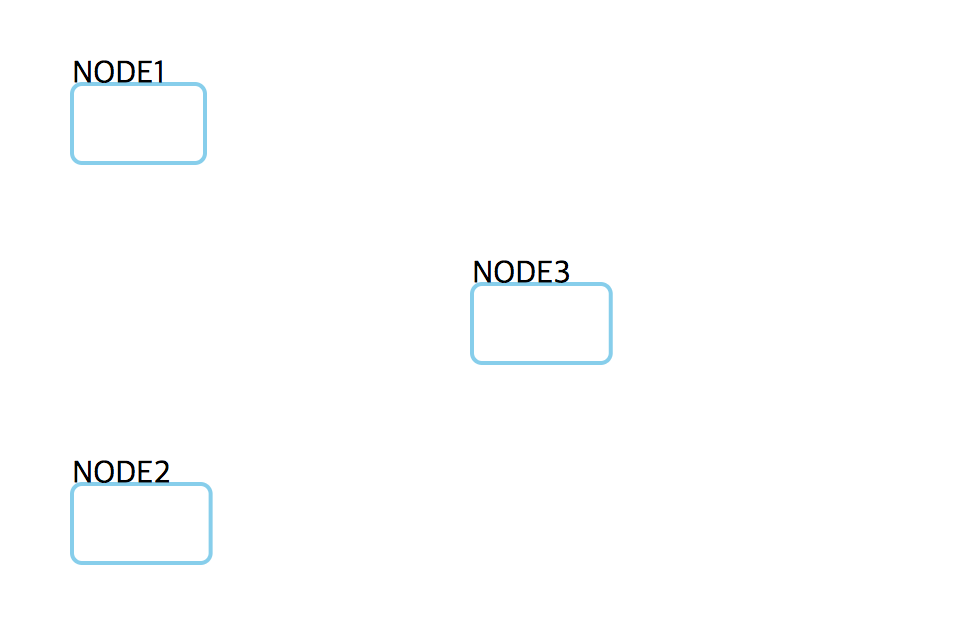
위와 같아지는데, 기본적으로 text 요소의 포지셔닝이 다른 요소들과 다른 것 같다. getBBox를 이용해 이를 보정하는 코드를 삽입해보자.
// node label
var text = document.createElementNS('http://www.w3.org/2000/svg', 'text');
text.textContent = d.name;

// 여기서 getBBox를 호출할 경우, text.getBBox() => { x:0, y:0, width:0, height:0 }

node.appendChild(text); // 여기서 렌더링이 이뤄지므로 렌더링 한 이후에 getBBox를 호출해야함!

var bbox = text.getBBox();

// text의 x, y 좌표
text.setAttribute('x', - bbox.width / 2);
text.setAttribute('y', bbox.height / 2);

// node rect
var rect = document.createElementNS('http://www.w3.org/2000/svg', 'rect');
rect.setAttribute('rx', 5);
rect.setAttribute('ry', 5);
node.insertBefore(rect, text);

// rect의 x, y 좌표 및 크기 설정
rect.setAttribute('x', bbox.x - bbox.width / 2 - textMargin);
rect.setAttribute('y', bbox.y + bbox.height / 2 - textMargin);
rect.setAttribute('width', bbox.width + textMargin * 2);
rect.setAttribute('height', bbox.height + textMargin * 2);
위와 같이 수정한 후 이를 브라우저에서 열어보면 이렇게 이뻐진다!
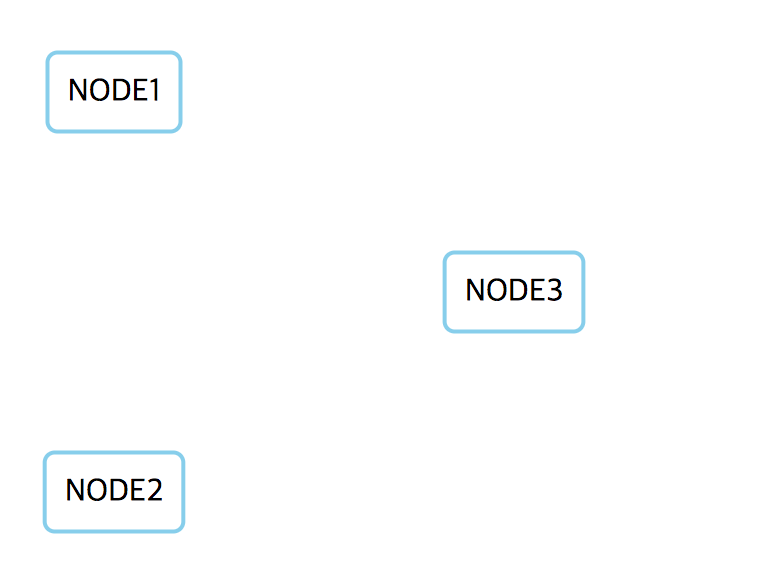
드디어 볼만한 노드가 그려지게 되었다. 이름이 긴 노드를 추가해서 다른 길이에서도 제대로 작동하는지 테스트해보자.
// Data
var data = [{
    name: 'NODE1',
    x: 200,
    y: 100
}, {
    name: 'NODE2',
    x: 200,
    y: 300
}, {
    name: 'NODE3',
    x: 400,
    y: 200
}, {
  name: '이름이 기이이이이이인 NODE4',
  x: 400,
  y: 400
}];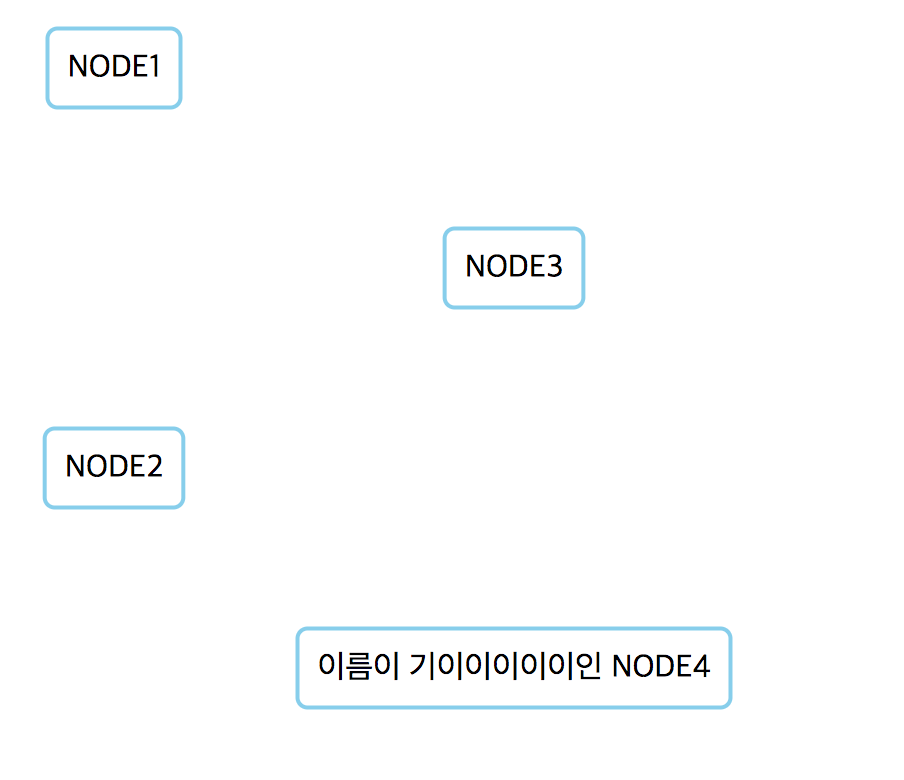
길이가 긴 노드에서도 노드가 제대로 위치하는 것을 볼 수 있다.
마지막으로 노드의 중심점이 데이터에 지정된 x, y좌표에 제대로 위치하는지 확인해보기 위해 circle을 넣어보면,
// 중앙 위치 확인용 circle
var circle = document.createElementNS('http://www.w3.org/2000/svg', 'circle');

circle.setAttribute('r', 3);
circle.setAttribute('fill', 'red');

// 중심점의 x, y좌표
circle.setAttribute('cx', 0);
circle.setAttribute('cy', 0);

node.appendChild(circle);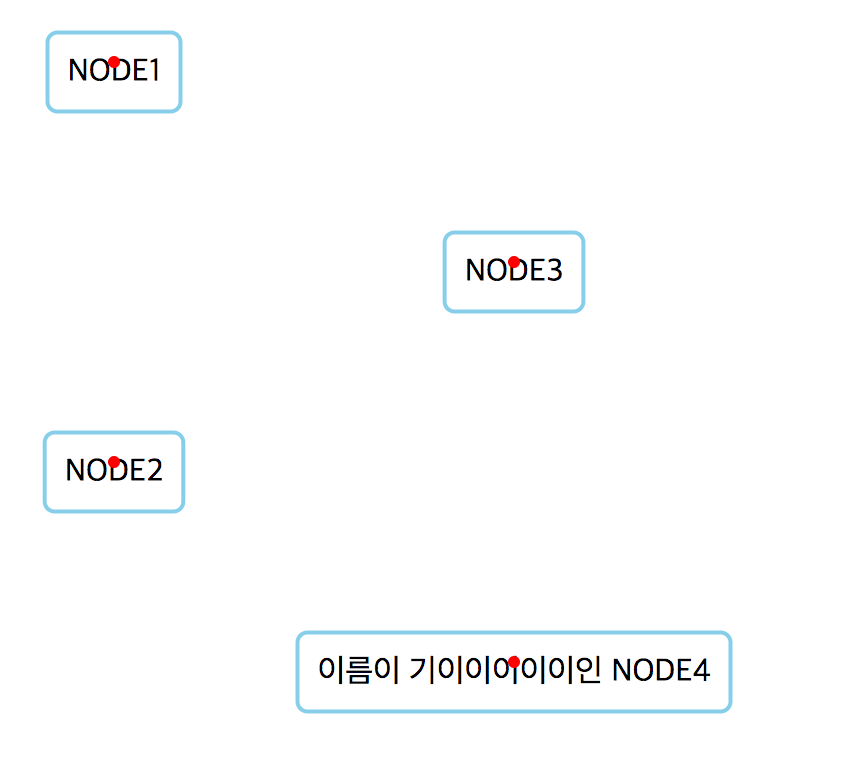
중앙에서 약간 위에 위치하고 있어 어느정도의 오차가 있다고 볼 수 있지만, 이정도면 봐줄만 한 것 같다.
예제 코드 및 실행 결과는 blocks를 통해 확인하실 수 있습니다.
Comments